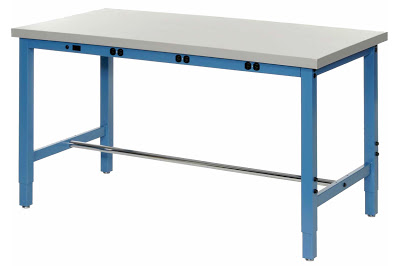
Workbenches are primary workspace tools that find extensive applications everywhere from your home to offices, company, clean rooms, Laboratory Supplies, and many more. You must have come across many specifications and benefits of tailor-made benches that manufacturers swear by but through this article we would want to ask whether you are comfortable with the table you work on. Does your backache because of inappropriate table dimensions? Does your table provide the flexibility to readjust according to the requirements? If not, we want you to sit back and find the best solutions to your problem.
The need for a flexible table at work
Not all areas are spacious enough to accommodate multiple benches of varying dimensions and design to suit particular needs. Most people prefer such worktables that can be adjusted time and again according to the nature of work. Moreover, this idea is ergonomic, cost-friendly, and provides enhanced efficiency at workstations. So if you have been thinking of renovating ideas, customize one for yourself to get the best fit.
What would be required to build an adjustable workbench height?
While redesigning one for yourself, you would need elementary commodities to start.
• Blueprint of the table design
• Plywood
• Benchtop laminating sheet
• Screws
• Rigid tie connectors
• Working tools like Chisel, hammers, glue, table saw
• Locking casters
Common adjustments that need to be done
The adjustability of your table top height would save you from backaches and strain build-up. Have you noticed that your workbench is either too low for some task or too high for others? You can try the following to make adjustments to your furniture.
Design Overview: Create a blueprint for the kind of bench you require. Understand how high or low do you want your table to be and create a reinforced frame with a lower section that can slide over the top. You can also add bottom shelves to the design or customize to build in extra shelves and drawers. Plan according to the budget and space available. It is suggested to keep the width and length the same as the original one to minimize the number of cuts.
Cut the plywood to its length: Take the appropriate measurements and rip the plywood sheet into parts to trim it to a suitable size. You will need the wood sheet for creating bottom and top lengthwise support, section lengths, width wise support system, and caster locks for the legs.
Assemble the frame: After you have trimmed the lumber into desired sizes, you have to assemble the parts and build the framework of the table. Connector ties would be required to strengthen bolted joints and resist sheer uplift. Use a screwdriver to fix in the screws and add support lengthwise and width wise. If required, use a spare piece of sheet to ensure that adjacent sides line up to the same height.
Add the bottom support: It is better to pay detailed attention to the leg support. For a good workbench table, it should have a strong framework system to avoid rocking or swaying movements while working. To build an Adjustable height Workbench, fix the lower wooden support on all four sides just a little above the bottom of the leg with the help of Simpson ties and screws. Here, you can also construct an under table shelf for extra storage. For that, you would need the ply sheet of the correct dimension to be fixed above this frame.
Insert the slide: There are various ways in which you can build the slide to get the desired height for your table. Either add wooden slide support adjusted with screws and slide channel to create a smooth flow using torsion-box or generate a drill supported slide with trailer jacks, steel rods, and a handle. Take a steel rod of the same width as the handle and place it in such a way that it runs up from the top to the other side. A jack attached to a handle is used to create a slide.
Add in the casters: Casters are optional though adds mobility to your bench. You can shift the table to another location according to your work convenience. It also adds to the overall bench height.
Optional modifications: When you reconstruct your bench table, it is better to keep small details in mind. Add a magnetic toolbar to one side for easy tool handling. You can also add hooks, drawers, extra racks for an efficient workspace stainless flat pack.

